This blog is going to cover the process of finishing armour – also often referred to as ”antiquing”. The end process might seem like an odd place to start, but hold fire because there’s method in my madness.
The key to making a proper leather armour is making it look real. Real armour isn’t made to make you look good, it’s not made to keep up with fashion – real armour has a singular and important role. Real armour is designed to make sure you go home after the battle. Real armour saves your life.
Ask your self what would an armour designed to take scrapes and cuts and bolts and slashes and gouges and all manner of abuse look like after even a single battle?
Real armour is battle-worn, only a coward would wear armour without a single blemish.
Much of what I do is trial and error. I began my adventure into leather-working long before the internet and even now, I find it hard to source honest advice and guidance online. So my journey has involved many dead ends, u-turns and a whole lot of swearing at the moon. I want to make it clear I am not complaining and I wouldn’t change a thing about where I am now or how I got here. I am merely pointing out that every eggshell step has been hard fought and every inch gained, has taken time.
It’s taken time to refine my art and it’s fun sometimes to look back and revisiting some of the crazy things we used to do. Finishing is my favourite example. Nowadays, I have developed an entire antiquing/tarnishing process which can be done in the comfort of my kitchen accompanied by many cups of tea and iTunes. A few years ago, however, I had a different strategy.
Armour needs to look dirty and worn right? And how would one accomplish that? Yep, you guessed it – I’d literally go put and kick it about the yard.
How do you make armour look like it’s been run through by a charging knight? Well, you take it out into the car park and you run it over with your car.
Armour needs slashes and gouges, right? How about beating it with swords and axes and generally kicking nine bells of hell out of it?
It works and it can be fun, but trust me, a little bit of mood music and some earl grey in the kitchen is so much better.
Before you start doing anything! Make sure you have a safe and clean work surface to work on and make sure you have a large supply of rubber gloves to hand. Remember you are working with leather and essentially your hands are also leather. Trust me, you don’t want to be dyeing your hands with leather stain. To be fair, you probably will anyway – but at least I tried to warn you.
So, how do you achieve a worn look without treating your armour like you hate it? Good question! The first stage in making good-looking authentic battle-worn armour for LARP, SCA and re-enactment events is getting the stain right.
I have experimented over the years with many dyes and solutions and I share a lot more of my specific experiments in my leather-working course videos, which are available free on my website. I won’t go into too much detail about that now, because the next step is much more important.
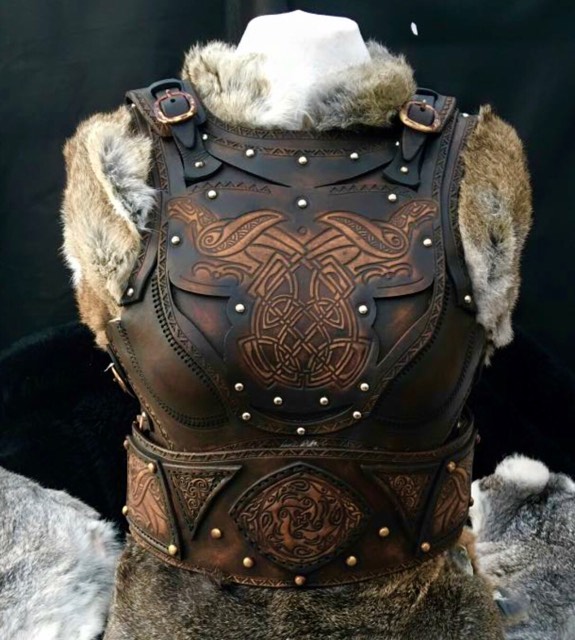
How you apply your dye or stain is as important as what it’s made from. What you are trying to do is make the armour look like it has had some life. Remember, armour was always expensive and it would have been handed down through the family. To achieve the worn look simply apply your solution with a kitchen sponge. Take care to add more on the edges, on the bottom and at the sides. Remember leather armour is always going to be darker round the edges and the bottom. I would also recommend staining both sides of your armour, even though you’ll seldom see the reverse. You’ll want to make the coating as thorough as possible and build it up layer by layer. After you’ve fully coated the armour fully and left it to dry. You can begin the final process of finishing it.
My armours and most good armours include details, embossing and other embellishments and the best way to bring out that detail is by scuffing it gently. To bring those little touches out, I use a very fine wire wool. I begin by tearing little clumps of wire wool and then I use my index finger to rub lightly over any details I want to bring out. Now remember, the key to making your armour look good is to make it look as if it has aged naturally and nothing ages naturally in a uniform fashion. So take care to spread the process around and try not to be too symmetrical. The dye I use has a built in sealant, but if you need to, you can add a final coat after you’ve finished your detailing. Once it dries and you’ve tidied up, you should end up with an armour that looks like it’s done the rounds… which is exactly what armour should look like.
Author – Neil Campbell.